


 Eng
Eng 
 русский
 Home / News / Industry News / How to Adjust Gland Packing Pressure: Step-by-Step Pump Packing Adjustment Guide
 How to Adjust Gland Packing Pressure: Step-by-Step Pump Packing Adjustment Guide
 2026.08.19
 Industry News
Article Directory
- 1 Why Precise Gland Packing Pressure Adjustment Matters
- 2 Before You Adjust: Installation and Preparation Basics
- 3 The Step-by-Step Gland Packing Pressure Adjustment Procedure
- 4 Target Leakage Rates for Different Services
- 5 How Packing Material Affects the Adjustment Process
- 6 Common Adjustment Problems and How to Fix Them
- 7 Establishing an Adjustment Routine
If you have ever overtightened a pump packing gland, you already know the cost of getting it wrong: a glazed shaft sleeve, a burned packing set, and a pump that suddenly demands more power while leaking even more than before. The most common misconception among maintenance crews is that gland packing pressure equals maximum bolt torque. In reality, the correct adjustment is a controlled balance between leakage and friction, achieved by making small, deliberate turns and then giving the packing time to respond.
Adjusting gland packing pressure is not a single tightening event. It is an iterative process of compressing the packing rings just enough to establish a thin fluid film between the packing and the shaft sleeve. That film lubricates the interface, carries away heat, and prevents both leakage and dry running. This article explains the complete adjustment procedure, including preparation, step-by-step tightening, target leakage rates, and how packing material choice changes your approach.
Why Precise Gland Packing Pressure Adjustment Matters
Packing works because it is compressed radially against the shaft and the stuffing box bore. When you tighten the gland nuts, you convert axial force into radial force, pressing the packing rings outward. The right amount of compression creates a seal that is neither too loose nor too tight. Get it wrong, and the consequences are predictable:
- Over-tightening: The packing presses too hard against the shaft sleeve, wiping away the lubricating fluid film. Friction rises sharply, heat builds up, and the packing hardens or carbonizes. In severe cases, the shaft sleeve develops scoring and grooving, and the packing fails within hours rather than months.
- Under-tightening: The packing does not make full contact with the sleeve, so process fluid escapes along the shaft. On a fire pump or marine shaft, that uncontrolled leak can be a safety hazard, and in chemical service it accelerates corrosion of the gland and surrounding equipment.
The practical takeaway: the goal of adjustment is to minimize leakage without letting the packing run dry, not to achieve zero leakage. A completely dry gland is almost always a sign that the packing is over-compressed and wearing out prematurely.
Before You Adjust: Installation and Preparation Basics
Adjusting gland packing pressure only works if the packing was installed correctly in the first place. If the rings are the wrong size, cut at the wrong angle, or stacked with misaligned joints, no amount of gland tightening will produce a stable seal. Review the carbon gland packing installation best practices for a full walkthrough; the key points are summarized below.
Remove, Inspect, and Measure
Start by removing the old packing completely. Check the shaft sleeve for scoring, pitting, or a stepped wear pattern. If the sleeve surface is damaged, replace it before installing new packing; otherwise, the new rings will wear unevenly and require constant readjustment. Measure the stuffing box bore diameter and the shaft sleeve outer diameter. Packing cross-section should match the stuffing box groove dimensions; trying to adjust a packing that is undersized or oversized is a losing battle.
Cut, Install, and Stagger the Joints
Cut each ring individually, preferably on a mandrel of the same diameter as the shaft sleeve, so that the joint is square and the ring sits flush. When installing, stagger the joints between adjacent rings, typically at 90 degrees or 120 degrees apart. Tighten the gland finger-tight after installation, then follow the adjustment procedure below. This evenly seats the rings around the shaft before you begin applying real compression.
The Step-by-Step Gland Packing Pressure Adjustment Procedure
Once the packing is installed and the gland is finger-tight, the adjustment process begins. The procedure below is suitable for centrifugal pumps, fire pumps, and marine shaft glands, with only minor variations in target leakage.
Step 1: Start the Pump and Observe Baseline Leakage
Start the pump and let it run for at least five minutes. During this period, the packing will seat against the shaft sleeve, and the initial leakage rate will usually be higher than the final target. Do not touch the gland nuts yet; the packing needs time to swell slightly and conform to the sleeve surface.
Step 2: Tighten in Small, Equal Increments
Stop the pump or, if the pump is equipped with a proper gland guard and safe access, you may adjust while running. Tighten the gland nuts evenly and gradually. Use a gear wrench and turn each nut in small steps. The critical rule: one flat of the nut, which equals one-sixth of a full turn, can change leakage significantly, so never wrench the gland a full turn at a time. Alternate between the two nuts, tightening each by the same amount to keep the gland parallel to the stuffing box face. A cocked gland creates uneven pressure on the rings and causes localized wear.
Step 3: Wait, Observe, and Repeat
After each small adjustment, allow the pump to run for several minutes before assessing the result. Packing needs time to redistribute under compression, and the leakage rate changes gradually rather than instantly. If leakage is still above the target rate, tighten both nuts by another one-sixth of a turn, wait again, and reassess. Repeat this cycle until the leakage stabilizes at the acceptable level.
If the gland becomes so tight that leakage stops entirely and the stuffing box temperature rises noticeably, back the nuts off slightly. A hot stuffing box is a warning sign, not a sign of a good seal. The correct operating point is a visible drip with the gland running warm but not hot.
Step 4: Final Check and Re-torque
After several hours of operation, the packing will settle further. Re-check the gland nut position and the leakage rate, and make minor corrections if needed. On new installations, a second adjustment after 24 hours of operation is normal. Document the final nut position and leakage rate for future reference, so that subsequent adjustments can be made faster and with confidence.
Target Leakage Rates for Different Services
A single universal leakage rate does not exist; it depends on the pump type, shaft speed, and the nature of the fluid. The table below gives practical reference ranges used in industrial maintenance.
| Service Type | Target Leakage Rate | Notes |
|---|---|---|
| General water service | 40–60 drops per minute | This range ensures adequate lubrication of the packing |
| Fire pumps (NFPA-style duty) | About 60 drops per minute | Too little leakage risks dry running during weekly testing |
| Marine shaft glands (vessel underway) | 2–10 drops per minute | Dripping is desirable when the shaft is rotating |
| Chemical process pumps | Keep to the lowest rate that still lubricates, often 10–30 drops per minute | Minimum leakage limits environmental and safety risks |
| High-speed or high-pressure pumps | Check OEM manual first | Leakage rates are highly specific; consult the original pump manual |
If the product being pumped is hazardous, hot, or prone to crystallization, never allow leakage to evaporate and leave solid residue on the sleeve. The residue acts as an abrasive and rapidly wears the shaft. In such services, the target leakage should be the minimum that still provides lubrication, and the packing material should be selected accordingly, as discussed next.
How Packing Material Affects the Adjustment Process
The adjustment procedure itself is similar across materials, but the response to compression differs, and choosing the right packing can reduce how often adjustment is required. For gland packing product selection, consider the following behavior patterns.
PTFE-Based Packing: Smooth but Watch the Heat
PTFE packing has a low coefficient of friction, so it runs smooth and requires less gland compression than graphite or aramid alternatives. The risk is not friction but heat accumulation. Because PTFE conducts heat poorly, over-tightening raises the temperature in the stuffing box quickly, which can cause the packing to soften and extrude. If you are adjusting PTFE packing, tighten in smaller increments and give longer observation intervals. A PTFE gland packing set is an excellent choice for chemical and caustic services where low friction and chemical resistance are priorities.
Graphite and Carbon Packing: High Heat Tolerance, Slower Seating
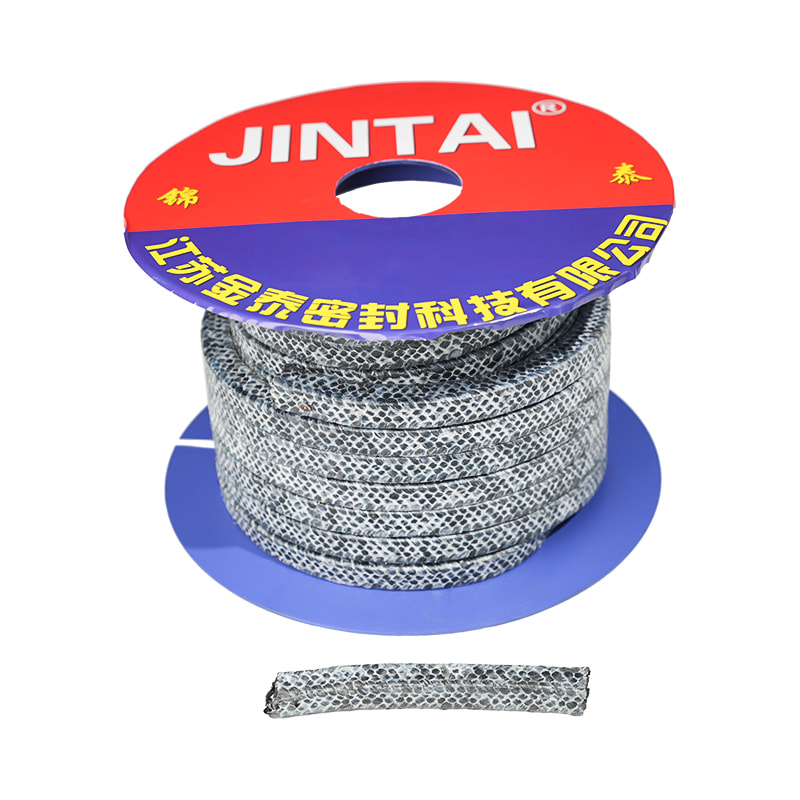
Graphite-based packing conducts heat away from the shaft sleeve effectively, which makes it forgiving of slight over-tightening. However, it is less elastic than PTFE and takes longer to settle. Plan on a longer run-in period and expect to make additional small adjustments over the first day of service. For hot water, steam, and high-temperature applications, pure graphite gland packing offers stable sealing performance at high temperatures, but the crew needs patience during initial commissioning.
Aramid and Carbon Fiber Packing: Requires Lubrication
Aramid and carbon fiber packing are strong and abrasion-resistant, but they are less inherently lubricating than PTFE or graphite. The fluid film carried by leakage is critical for these materials. If you run them too dry, the outer fibers become brittle and break down quickly. High-speed, high-wear services often pair these fibers with PTFE or graphite impregnation. For pumps with shaft runout or particulate-laden fluids, carbon fiber gland packing can hold up better than standard aramid, provided you do not starve it of lubrication.
Common Adjustment Problems and How to Fix Them
Even with the correct procedure, gland packing behaves unexpectedly sometimes. The following troubleshooting points cover the most frequent issues encountered during adjustment.
Problem: Stuffing Box Runs Hot but Leakage Stops
This is a classic over-tightening symptom. The packing has compressed to the point where the shaft sleeve is dry, and friction is generating heat. Loosen the gland nuts slightly until a visible drip resumes and the temperature drops. If the packing has already hardened or glazed from the heat, it will not recover; replace it and adjust more gradually the second time.
Problem: Leakage Cannot Be Reduced No Matter How Much You Tighten
If tightening the gland to near maximum still leaves a strong leak, the problem is likely not the gland nuts. The packing may be the wrong cross-section for the stuffing box, the rings may be too few, or the box may be worn. It is also possible that the packing was cut at an angle that leaves a direct leak path through the joints. The graphite gland packing temperature range guide explains how temperature and material limits affect packing performance; exceeding those limits can also produce persistent leakage even with correct installation.
Problem: Frequent Need for Re-Tightening
Some settlement is normal in the first hours of operation, but repeated re-tightening every few days indicates a deeper issue. Possible causes include: a worn shaft sleeve causing the packing to lose radial contact, a single ring whose joint is not staggered correctly, or the wrong packing style for the shaft speed. Rebuild the gland assembly, verify the sleeve condition, and confirm the packing style is appropriate for the service.
Establishing an Adjustment Routine
Gland packing pressure is not a set-and-forget setting. It drifts as the packing gradually compresses and wears, and it should be checked on a routine schedule. On critical pumps, log the leakage rate and gland nut position during each shift so that a slow change is noticed before it becomes a failure. A simple rule for maintenance planning: if a packed pump needs re-tightening more than once a week, the packing has reached the end of its service life, and replacing it is cheaper than continuing to force an adjustment.
The takeaway is straightforward: always adjust in small steps, wait between adjustments, and respect the difference between a dry gland and a correctly packed gland. A thin, steady drip is not a defect; it is the sign that the packing is working as designed.

 Home
Home +86 152 4020 4398
 zdjt004@jsjtmf.vip
 No.2 Xingyuan East Road, Yuanzhu Town Industrial Park, Taixing City, Jiangsu Province, China
Copyright © 2024. Jiangsu Jintai Sealing Technology Co., Ltd. All rights reserved. Custom Sealing Gaskets, Sealing Packing, Rubber Products
